Monthly Archives: February 2013

chicken broccoli casserole

Standard

chicken broccoli casserole  I  frozen pizza, again?


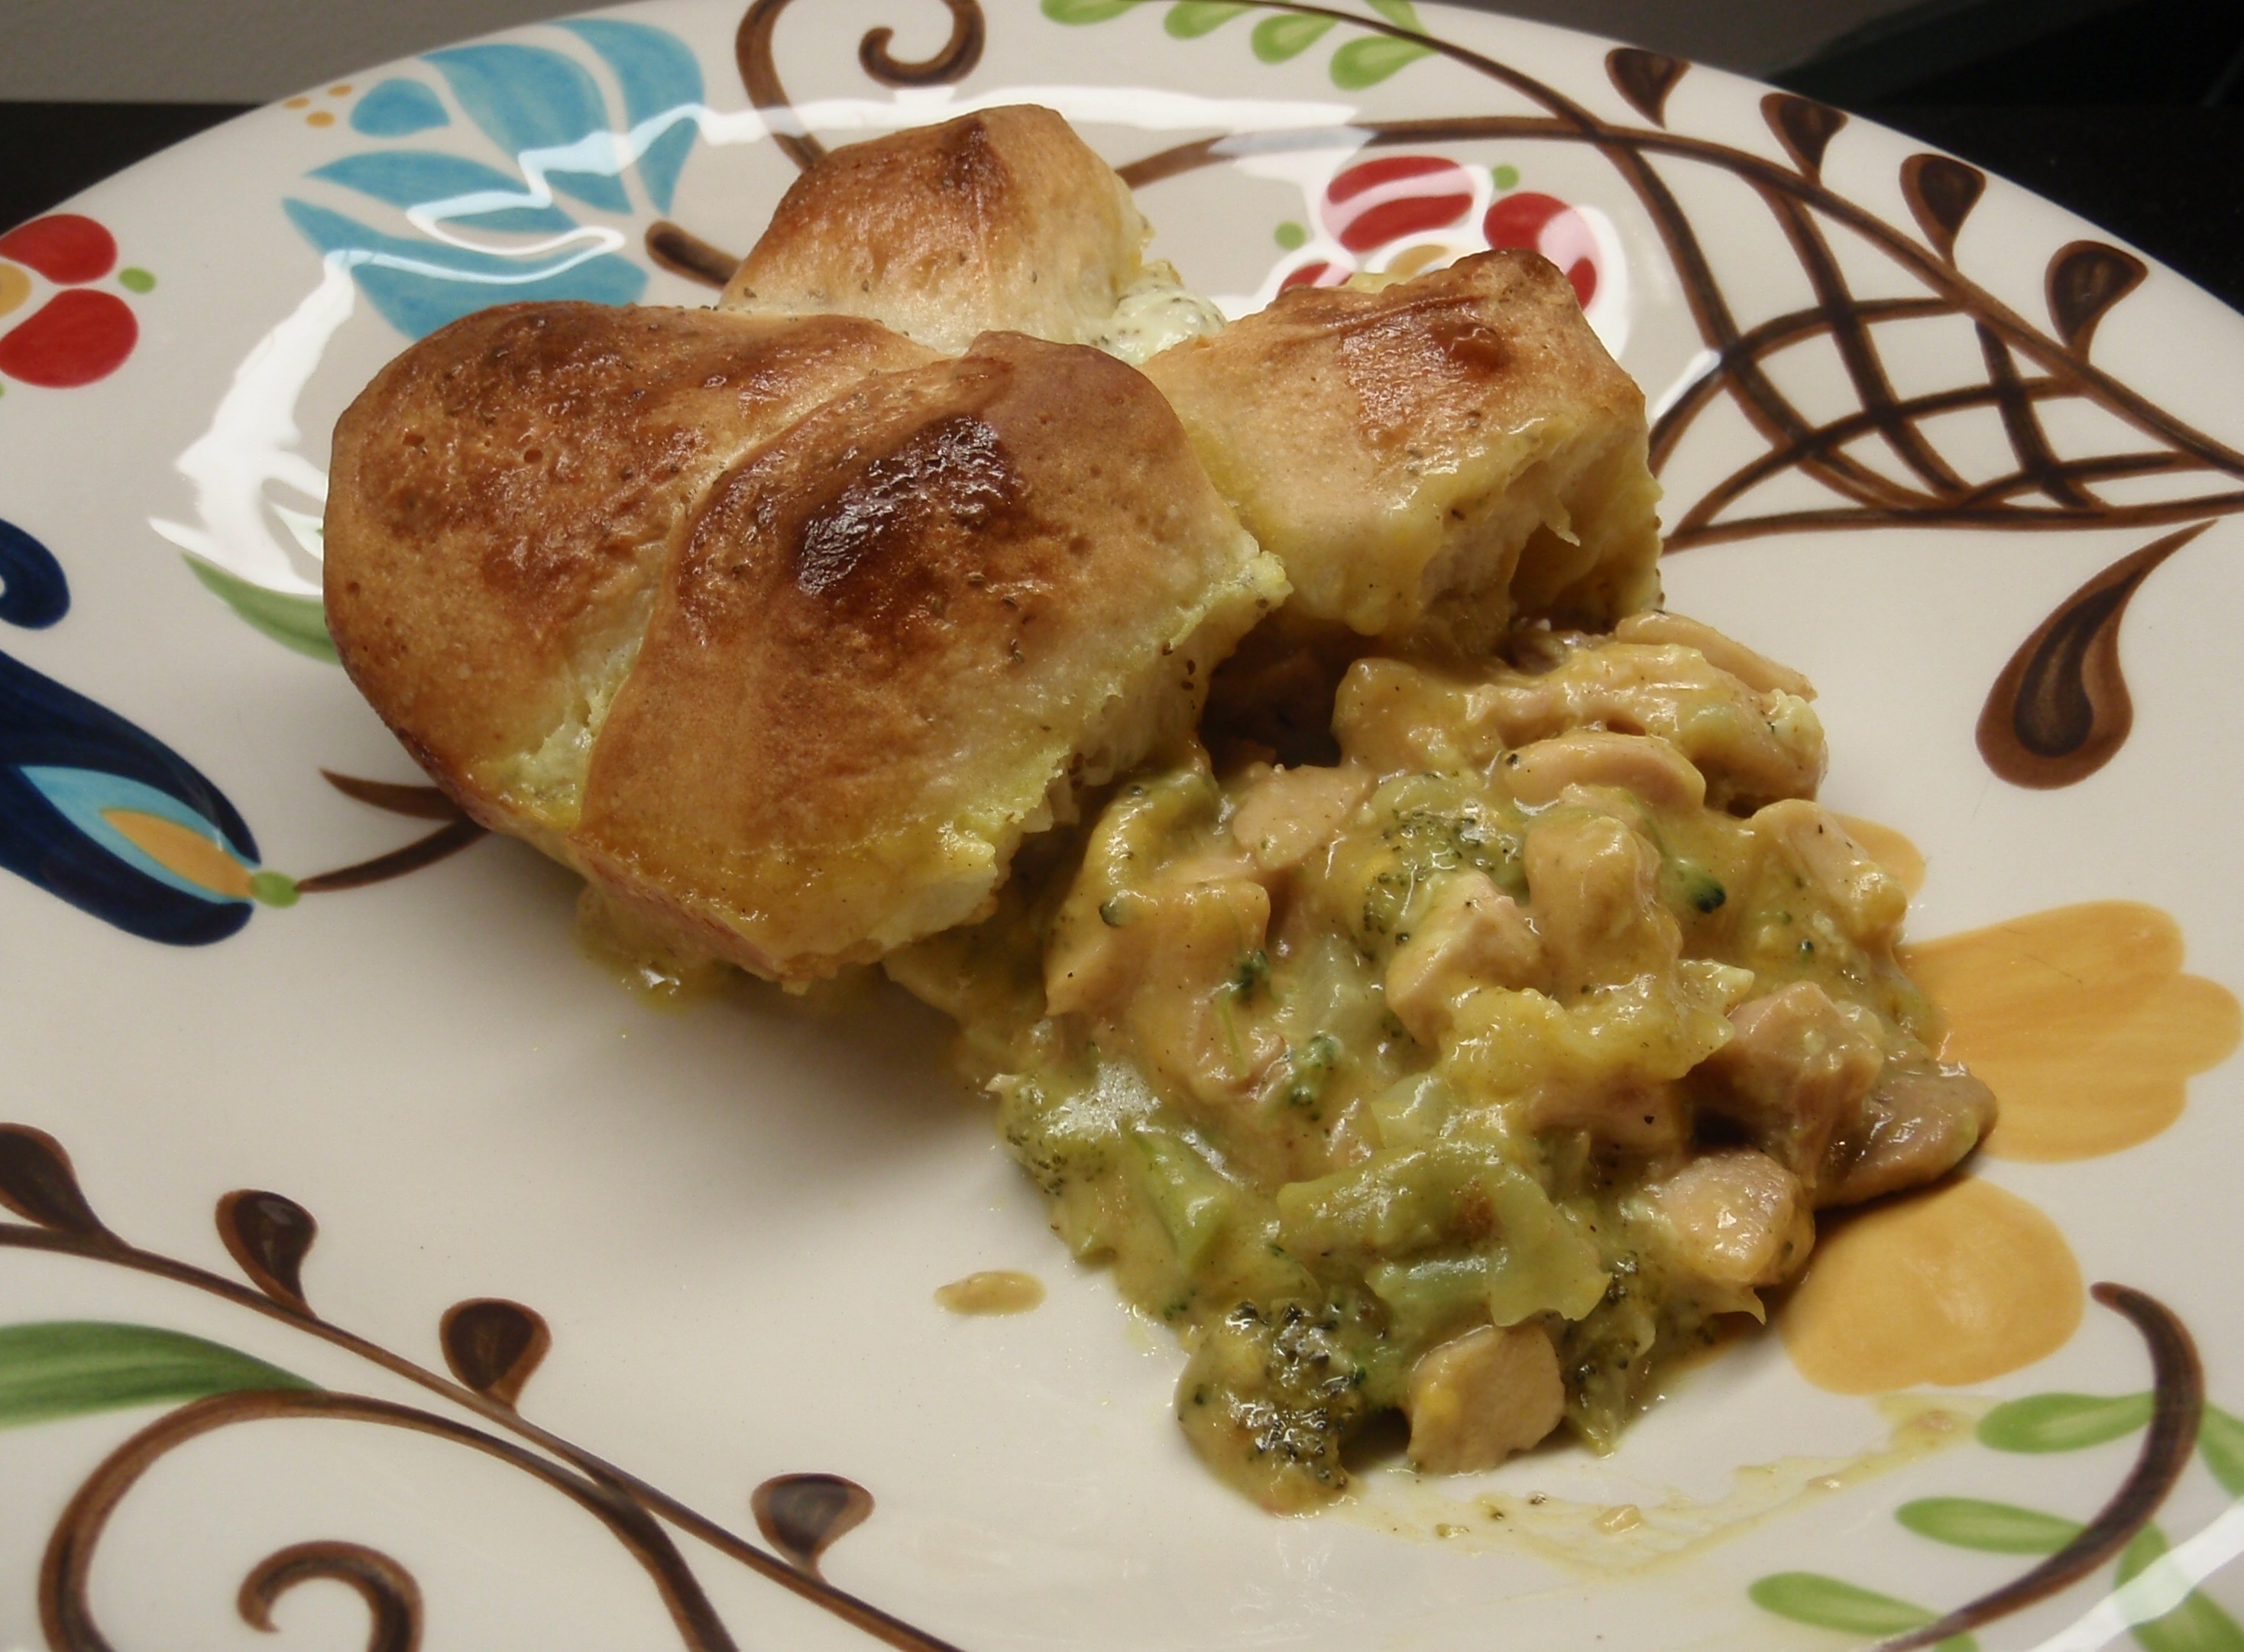
This dish got an emphatic “really good!” from Russell, and I second his statement. Everything about this was yummy. I was worried he wouldn’t like the curry, but that’s what really made the dish. The recipe is easy but a little time-consuming (including cooking the chicken and broccoli).

chicken broccoli casserole  I  frozen pizza, again?


Chicken Broccoli Casserole
From the Kitchen of: Tricia at Once A Month Mom

Prep Time: 1 – 1 ½ hours
Servings: 4-5

Ingredients

10 oz cream of chicken soup * Topping:
¼ cup onion, diced ¼ cup sour cream
¼ cup mayonnaise 1 egg
1 ½ tsp Worcestershire sauce 1 tsp celery salt
1 tsp curry ½ tsp salt
2 cups chicken, cooked & diced
1 cup cooked broccoli, drained & chopped
½ cup cheddar cheese, shredded & divided
1 (8 oz) can refrigerated biscuits *I used a 10 ¾ oz can.

Instructions
Preheat oven to 375°F.

In a deep dish 8×8 pan combine chicken, broccoli, soup, onion, mayonnaise, Worcestershire sauce, curry, and ¼ cup cheddar. Mix well.

Sprinkle rest of cheddar on top. Bake for 20-25 minutes.

While casserole is baking combine topping ingredients in a small bowl; mix well and set aside.

Separate biscuits and cut each in half (cut on the diameter, creating 2 half moons). Arrange biscuit halves on top of hot casserole, cut side down. Drizzle topping over biscuits.

Bake at 375°F for an additional 20-30 minutes or until biscuits are golden brown.

Freezing Instructions
In a deep dish 8×8 pan combine chicken, broccoli, soup, onion, salad dressing, Worcestershire sauce and curry. Mix well.

Sprinkle cheddar cheese on top. (DO NOT BAKE as you do above.)

Separate biscuits and cut each in half. Arrange biscuit halves on top of casserole, cut side down. Drizzle topping over biscuits. Cover and freeze.

To serve: Do NOT thaw. Bake covered with foil at 375°F for 45 minutes. Remove foil and continue baking for another 20 minutes or until biscuits are cooked and golden brown.

Notes

  • Though delicious this dish is a bit on the salty side. To cut the amount of salt try using a reduced sodium soup and any of the other ingredients that have a reduced sodium version.

  • Some people commented on the original blogger’s post that their biscuits did not cook after being frozen. To prevent that I suggest freezing only the chicken mixture and then adding the biscuits and topping the day of.


-♥-
 Katy
 

luscious lasagna

Standard

luscious lasagna  I  frozen pizza, again?


This was my first time to make lasagna from scratch; usually I just buy Stouffer’s frozen lasagna. And now that I think about it, the only lasagna we ever ate in my family growing up was Stouffer’s frozen lasagna; I’m fairly certain my mom doesn’t even have a recipe for lasagna in her recipe book. So I was pretty excited to make my first lasagna because homemade lasagna just screams “whoever made this is a domestic goddess” (well, it does to me).  And I am earnestly trying to increase my domestic goddess skills.

[Side Note: The fact that my mom doesn’t make homemade lasagna does not decrease her domestic goddess status. She does lots of other things to make up for the lack of homemade lasagna. Also, I don’t ever remember thinking as a kid that I would really prefer homemade lasagna instead of frozen.]


luscious lasagna  I  frozen pizza, again?


I was expecting this to be a hard task because homemade lasagna makers seem to complain about how involved it is to make a lasagna. But I didn’t think this recipe was any more involved than other casseroles I’ve made. Sure, you have to take time to prepare and then layer the ingredients, but I can think of at least 2 other dishes that involve a similar process. So, if there are any other novice cooks out there wanting to attempt a homemade lasagna, this is a great recipe with which to start.

[Side note: This recipe comes from my mother-in-law, who doesn’t need a lasagna recipe to make her a domestic goddess because she does so many other ridiculously domestic things (like bake wedding cakes, sew anything and everything, and teach nursery kids on Sunday mornings).]


luscious lasagna2  I  frozen pizza, again?

Luscious Lasagna
from the kitchen of: my mother-in-law

prep time: 1.5 hrs +/-
servings: 8-10

Ingredients
12 lasagna noodles
1 ½ lbs ground chuck
1 (28 oz) jar spaghetti sauce with mushrooms (the mushrooms are optional)
3 eggs
24 oz cottage cheese
3 cups mozzarella cheese, shredded
salt and pepper, to taste

Instructions
Preheat oven to 350°F. Spray a 9×13 casserole dish with non-stick cooking spray. Set aside.

Cook lasagna noodles according to package directions, using the shortest cook time. (You want the noodles to be not quite al dente so they won’t overcook in the oven.) Add noodles to water one at a time so they don’t stick together. After they are done cooking drain and set them aside. (I recommend rinsing them in hot water to prevent them from sticking together as they cool.)

Brown meat in a large skillet. Drain grease, and then rinse meat to remove any extra grease. (I did not rinse my meat and the flavor was not affected. However, I do think that the extra grease might have prevented the sauce from clinging to the noodles.) Season the meat with salt and pepper, to taste. Add spaghetti sauce to browned meat and mix well.

In a medium bowl combine cottage cheese and eggs until well blended. (I recommend scrambling the eggs in a separate bowl before adding them to the cottage cheese.)

Line the bottom of the casserole dish with 4 cooked noodles, overlapping the edges. Cover the noodles with half of the meat mixture, then half of the cottage cheese mixture, then half of the mozzarella cheese. Repeat the layers (noodles, meat, cottage cheese). Top the second layer of cottage cheese with a layer of noodles before adding the second layer of mozzarella. Your layers should be as follows:

(top)
mozzarella
noodles
cottage cheese
meat
noodles
mozzarella
cottage cheese
meat
noodles
(bottom)

Bake for 45 minutes. Let set about 10-15 minutes before serving.

Notes

  • I added 2 cloves chopped garlic and 2 tsp dried minced onion to the meat as it was browning. (I cooked 2 lbs of meat and saved the extra half pound for another meal.)

  • The lasagna will completely fill your casserole dish once it is assembled. Unless you are using a deep dish I recommend putting a cookie sheet under the casserole dish to catch any spillovers during baking.

  • You should definitely serve this with plenty of grated parmesan. My family has a saying, “Cheese is good. Cheese is your friend.” My family eats parmesan cheese on just about every pasta dish. I just recently learned that Russell’s family only eats parmesan cheese on spaghetti. I find that very sad.


-♥- Katy
 

white chicken enchiladas

Standard

white chicken enchiladas  I  frozen pizza, again?

This is one of the first recipes I tried after joining Pinterest over a year ago. It is an easy recipe with big results. I have made it several times since then and always receive compliments.
 
white chicken enchiladas  I  frozen pizza, again?

(This photo shows the sauce really well. Look at all those yummy green chilis!)


The original recipe is pretty tasty, but I wasn’t quite satisfied with it. So I experimented several times, adding various spices, and finally stumbled upon my favorite version when we had company over for dinner a few weeks ago. Instead of adding spices to the sauce, I added peppers and onions to the filling and substituted pepper jack for monterey jack. They both really helped fill out the flavor of the dish.


white chicken enchiladas  I  frozen pizza, again?

White Chicken Enchiladas
adapted from the kitchen of: Joyful Momma’s Kitchen

Prep Time: 1 hour
Servings: 3-5

Ingredients
10 flour tortillas
2 cups chicken, cooked and shredded
2 ½ cups (or an 8 oz block) pepper jack cheese, shredded
1 (1 lb) bag frozen pepper stir fry, thawed (I only used about ¾ of the bag)
3 tbsp butter
3 tbsp flour
2 cups chicken broth
1 cup sour cream
1 (4 oz) can green chilis

Instructions
Preheat oven to 350°F. Spray a 9×13 casserole dish with non-stick cooking spray; set aside.

Combine chicken, pepper stir fry, and 1 ½ cups of cheese in a medium bowl. Roll the mixture in tortillas and place in casserole dish. (I suggest being conservative when filling the tortillas to make sure each gets enough. Then if you have any leftover you can add it to the least filled tortillas.)

In a sauce pan over medium heat, melt butter, whisk in flour, and cook 1 minute. Add broth and whisk until smooth. Continue heating the mixture until thick and bubbly, stirring often to prevent burning.

Stir in sour cream and chilis. Do NOT bring to a boil (no curdled sour cream).

Pour sauce over enchiladas and top with remaining cheese. (After I pour the sauce on the enchiladas I spoon some of it over any parts of the tortilla that do not have sauce of them, usually the ends. This helps the tortillas not dry out in the oven.)

Bake approximately 20-22 minutes, and then under high broil for 3 minutes to brown cheese.

(Side Note: If you are baking something else after this do not forget to turn the oven back to bake after the enchiladas are done. That is how I ruined the dessert for the evening.)

Notes

  • The green chilis in the sauce do not make the sauce spicy at all; they only add flavor.
  • Pepper Jack cheese is spicy; however, when I used it in this dish I did not detect any spice/heat at all. I think the sour cream balances out the heat. (If it helps, I am a mild to medium heat kind of girl.)
  • In case your store doesn’t carry “pepper stir fry” all it consists of is red bell pepper, green bell pepper, and onion.


-♥-
Katy
 

beef rice with meatballs and broccoli

Standard

beef rice with meatballs and broccoli  I  frozen pizza, again?

This recipe is another easy, one skillet recipe. And when I say easy I mean SUPER DUPER easy. It is so easy, in fact, that you won’t believe it. This is one of the few recipes I don’t have to write down to remember. And to make it even better, it can be ready to eat in just 30 minutes!


OLYMPUS DIGITAL CAMERA


Beef Rice with Meatballs and Broccoli
from the kitchen of: my mom 

prep time: 30 mins
servings: 4

Ingredients
1 (6.8 oz) box Rice-A-Roni beef flavored rice
1 (15 oz) bag frozen meatballs (½ oz meatballs, approx. 30 in a bag)
1 (14 oz) bag frozen broccoli

Instructions
Follow the directions on the rice box.

When you get to Step 2 add the water and Special Seasonings; stir. Then add the frozen broccoli and meatballs. Bring the mixture to a boil and follow the rest of the directions on the rice box.

Notes
I often like to add 1 tsp of beef granules along with the Special Seasonings to boost the flavor of the rice.


See, I told you that you wouldn’t believe how easy this recipe is.


-♥-
Katy

fiesta taco skillet

Standard

You may have noticed that I’ve been slacking in posting to the blog the last few weeks. I really have no excuse, just that I haven’t made time for it. But I hope this recipe (and the ones I plan to post very soon) make up for it.

fiesta taco skillet1  I  frozen pizza, again?


This is a recipe I found on Pinterest (actually, that’s where I find a lot of my new recipes). It is an easy-to-make, one skillet dish that makes for a tasty meal and easy clean up.  
It’s actually very similar to a recipe my mother-in-law gave me called “Impossible Cheeseburger Pie.” Her recipe is good, but I kinda like this one better because of the cornbread. We Southerners really like our cornbread. 🙂  And none of that sweet stuff some people try to pass off as cornbread. If I wanted something sweet I’d rather eat cake. Funfetti cake. With pink Funfetti frosting. 

[FYI: Funfetti cake is the best box cake ever. Very few homemade cakes I’ve tried can top it. My wedding cake was even made from Funfetti cake mix! And pink Funfetti frosting is way better than regular white Funfetti frosting, but sadly Pillsbury doesn’t make it anymore.]


fiesta taco skillet2  I  frozen pizza, again?

Fiesta Taco Skillet
from the kitchen of: Carnation Milks

Prep Time: 45 mins – 1 hour
Servings: 4

Ingredients
1 lb. ground beef
1 can (11 oz.) Mexican-style corn, drained
2/3 cup water
1 packet taco seasoning mix / 2 tbsp homemade taco seasoning
1 cup shredded cheddar cheese
3/4 cup corn meal
1/4 cup all-purpose flour
2 tablespoons granulated sugar (optional)
2 teaspoons baking powder
3/4 teaspoon salt
1 cup evaporated milk
1 large egg, lightly beaten

Directions
Preheat oven to 400° F.

Cook beef in well-greased 10-inch cast-iron skillet over medium heat until no longer pink; drain. Stir in corn, water and seasoning mix. Cook over low heat for 6 to 8 minutes or until mixture thickens. Top with cheese.

Combine corn meal, flour, sugar, baking powder, and salt in medium bowl. Combine evaporated milk and egg in small bowl; mix well. Add milk mixture to corn meal mixture; stir just until blended. Spread over top of meat-cheese mixture.

Bake for 20 to 25 minutes or until wooden pick inserted in center comes out clean.

Notes

  • If you don’t have a cast iron skillet cook the meat in a regular skillet and then transfer it to a deep pie dish before adding the rest of the ingredients. I made this dish that way several times before I got my cast iron skillet as a Christmas present.
  • If you use homemade taco seasoning instead of store-bought packet, you will need to add 1-2 tbsp of flour as well to thicken the meat mixture.
  • You can substitute equal parts regular milk for the evaporated milk. The corn bread will taste just fine whichever one you use; I’ve tried it both ways and can’t taste any difference.

Fun Fact
My chiropractor told me that cooking in a cast iron skillet is a great way to add extra iron to your diet.


-♥-  
Katy


a country experience for the city folk

Standard

Russell and I had a “this only happens in the country” experience this past weekend: we attended a livestock show and banquet. We were invited by a couple from our church whose granddaughters are part of the local 4H program. We weren’t really sure what to expect but we went anyway to support the girls. I was actually pretty excited, though, because going to livestock shows isn’t something we city folk do.

One of the granddaughters showing her pig.
(Sadly this was the least blurry picture we were able to get of her.)
livi  I frozen pizza, again?


The banquet was held Friday night in the gym of a local private school. It was much less showy than I expected, but there were pretty cowboy boot-wearing princesses and a queen. The queen received a $250 scholarship from a local Ag company. (Russell and I joked that the scholarship might buy one math book – college textbooks are so dadgum expensive!) I didn’t take any pictures because there wasn’t much to photograph and the lighting wasn’t very good. We also learned that the eldest granddaughter of our church members was the 2012 Livestock Show Queen.

This is her showing her pig.
2012 queen  I  frozen pizza, again?


**Note: I know most of the pictures are blurry to some degree, but again the lighting wasn’t very good and the animals moved around too much.**


The livestock show started at 9:30 the next morning. I figured it would probably take up most of the morning, but I didn’t realize it would take up the whole morning and part of the afternoon. We left a little after 12 to go eat lunch and they had just started showing the pigs, which were last on the schedule. This time I took a lot of pictures (60 actually) and my camera battery threatened to die on me towards the end. The show wasn’t quite as action-packed as I was hoping, but I did learn a whole lot about lambs, goats and pigs. 

We didn’t really understand what was going on at first because, even though there was an announcer, he couldn’t easily be heard over the animal noises. Eventually we realized that there was a program and that helped us follow along better. We figured out that we had just watched the showmanship competition where the kids get judged on how well they show and control their project/animal. The senior class went first (ages 14-18), then junior class (ages 8-13), then pee wee (under 8). We were told that the real competition doesn’t start until age 8; those who participate in pee wee are just getting practice.  

Aren’t they cute? (click pictures to enlarge)

 pee wee lambs
peewee lambs1  I  frozen pizza, again?peewee lambs2  I  frozen pizza, again?

 pee wee goats
peewee goats  I  frozen pizza, again?peewee goats2  I  frozen pizza, again?


Then we figured out that the second part of the show is when the animals are judged on how marketable they are. The judge looked at their shape and size and chose which is the most attractive. I think that this part is to help potential buyers decide which one to buy.

During the showmanship part each participant only shows one animal, but during the market part participants could show multiple animals per category. There were 6 categories of lambs, 2 of goats, and 6 of pigs. We couldn’t tell the difference among most of the breeds of lambs because they looked the same to our untrained eyes. The goats were only separated into lightweight versus heavyweight. The pigs, however, were much easier to distinguish because their markings were very distinct.


The best of each breed of lamb getting judged for “best in show.” 
(click picture to enlarge)
all lamb breeds  I  frozen pizza, again?


Even though this picture is blurry you can still easily see the distinct markings of the 3 pigs.
pig categories  I  frozen pizza, again?


We also learned that lambs, goats, and pigs are all handled in different ways. The lambs were easily led around by their handler. The goats required a harness around their head because they are stubborn. The pigs were guided by long poles (sort of like a riding crop). Oh, and we discovered that pigs defecate a lot. And by a lot I mean A LOT. And they don’t even stop or go off into a corner to do it; it just comes out as they are walking. (Kinda gross if you ask me, so I guess it’s a good thing I didn’t grow up on a farm. Of course, if I had grown up on a farm then I probably wouldn’t be grossed out by pig poo.)

lamb handling
lamb handling  I  frozen pizza, again?

goat handling
goat handling  I  frozen pizza, again?

pig handling (they were the only ones to use the pens)
pigs in pens  I  frozen pizza, again?


So even though it wasn’t quite what I had expected it was still a pretty interesting experience and definitely educational!